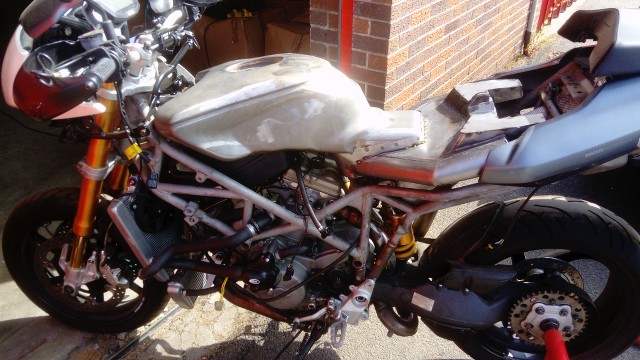
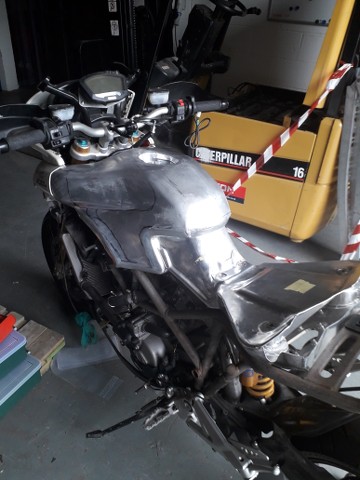
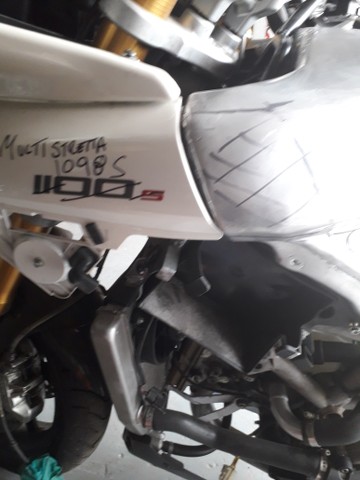
Ducati Multistretta 1098S

millemille

Well-known member
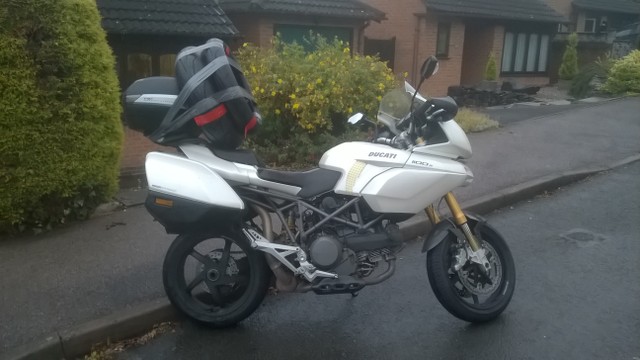
Way back in the mists of time, 2016 actually, I was looking for a "do anything" kind of bike and I came across a 2009 Ducati Multistrada 1100S for sale at a local, non-Ducati, dealership. The price was good, particularly as the bike came loaded with lots of genuine aftermarket Ducati Performance parts and a set of full hard luggage. Took it for a test ride and was smitten.

1606330942236.webp


I've owned/ridden/raced pretty much every iteration of 748/916/955/996/998 over the years so Ducati ownership doesn't strike fear in my heart, plus I'd done my research and was aware of all the myriad of issues that afflicted Multistrada's of that vintage.

So money changed hands and I rode away on my shiny white 'strada....

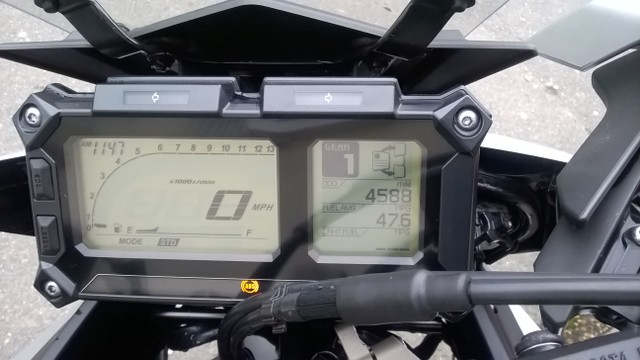
....and a few days later rode it back to the dealership so that they could sort out the reluctance to start, the leaking fuel tank, the misbehaving electrics and more. To their credit the dealership didn't argue and handed over a brand, with less than 300 miles on the clock, new Yamaha MT09 Tracer thing, with instructions to treat as if it were my own while they sorted out the 'strada.

Image


So I did, I had it for about 8 weeks and put over 4,000 miles on it....
Image


...and after 8 weeks, with the dealership making little progress with my Ducati and the novelty of the Tracer wearing off (and also fearing that they'd find out exactly what I'd done to their previously pristine Yamaha while I had it), I made the suggestion that a deal could be done to make all parties happy. Long and short of it, they gave me about half the purchase price back and I took the Ducati back to sort out for myself.

With the invaluable help of Nelly at Cornerspeed Ducati and the repository of all 'strada knowledge that is the Multistrada owners forum all of the problems were fixed and then work started on getting the best out of it. Uprated brakes, sorted suspension, tweaked geometry, lightened flywheel and so on....

The bike was awesome. I used it for commuting all year round in filthy weather...

Image


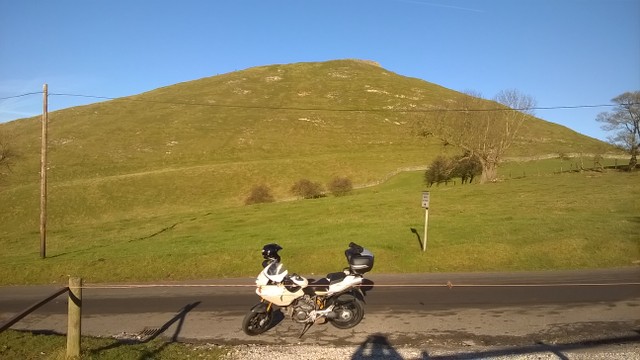
Pottering around the Peak District - where I'd moved to - checking out the roads and the scenery...
Image


Image


And the amusing, and apt, place names...

Image
 
Popping half way down the country to pick up a pair of scrubs and then finding you'd forgotten to pack the ratchet straps...
Image


And hooning around on it, riding it like a giant supermoto replete with MX lid and stormtrooper boots....

Image


On awesome twisty, winding, Alpine style roads like these...

Image


Image


...and embarassing the latest greatest superbikes.

But.......
 
.....as I got more used the handling and got more confident/stupid with the throttle the lack of power started to become an issue.

While the 1100 lump had decent low down grunt it's top end was a little lacking. 85bhp at the tyre if one is being realistic. And it showed, I was riding everywhere on the stop. I could have replaced the twist grip with an on/off switch. And that was starting to take the shine off the bike. I want a throttle that has to be treated with a modicum of respect, you shouldn't just be able to wang it wide open with no thought or fear.

I looked at tuning the 1100 lump. It seemed that 100bhp at the wheel was possible. If you were willing to invest the GDP of a small African country in tuning and accept service intervals akin to the lifespan of a fruit fly. And that was assuming that the engine actually lasted between the service intervals. So not viable for how I used the bike.

I test rode a new Multistrada. My God! But that engine was addictive! However when I tried to ride it with gusto, in the same supermoto style as I do the 1100, it rapidly tied itself in knots and plotted a course for the nearest hedge.

One day I was idly browsing the Multistrada owners forum and came across a post selling a 749 "Multistretta". "Hmmmmmm, what's one of those?" I wondered. It was a 1000 Multistrada - so for all intents and purposes the same as my 1100 - that had suffered a catastrophic failure of the original engine and the owner had fitted the engine from a 749 into it. He hadn't been looking for more power, it was just a cheap way for him to get the bike back on the road.

And lo, verily and forsooth, the scales did fall from mine eyes and I saw the path to happiness and contentment.

An engine transplant. The whole Ducati L-twin engine range, from time immemorial to the latest superbikes, all share the same crankcase castings. The major difference is where the swingarm pivot is machined in. Piece of piss. Find a 749, or maybe a 999, engine and running gear and jam it in the 'strada. Somewhere between 110 and 120bhp at the back wheel, don't need any more than that. In fact it'd be downright foolish to have more....
 
...so I bought a 1098 engine and running gear.

150bhp, or more. That's as near as fuck it is to swearing 120bhp isn't it? Isn't it?

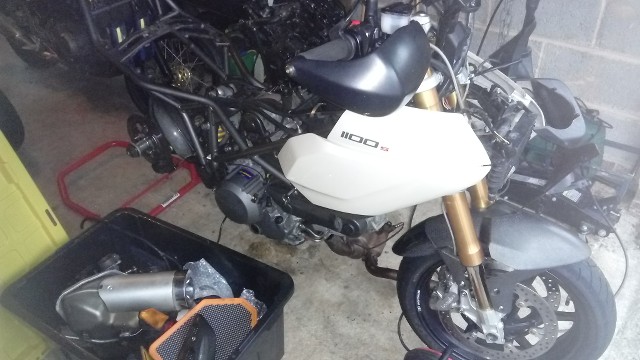
A guy on the Ducati Owners forum had a low speed spill on his 1098 and the insurance company had made it a Cat D write off. He'd bought it back from the insurance vultures and was breaking it and selling the parts at very reasonable prices as he only wanted to recover his costs and prevent the insurance company from making a profit on his misfortune. So one 1098 engine and all running gear was collected in the back of my big gay truck...

Image


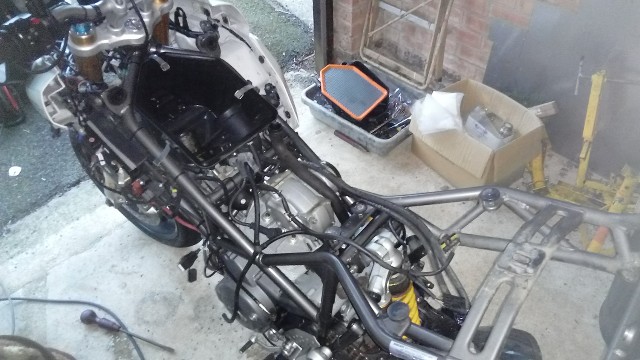
...and started stripping the 'strada down.

Image


Image


Image


The swingarm pivot bolt was, as it is with most Ducati's, stuck in place and required the gentle application of sledgehammer to remove.
 
This....

Image


...was applied to the frame and after the removal of these....

Image


..there was a 1098 superbike engine and Mutlistrada frame at the beginning of a happy and loving relationship...

Image


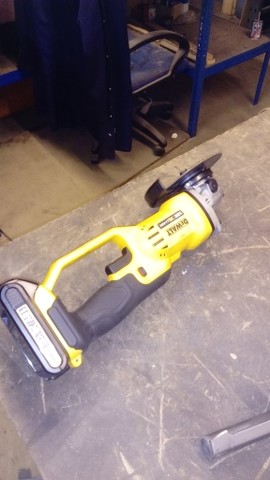
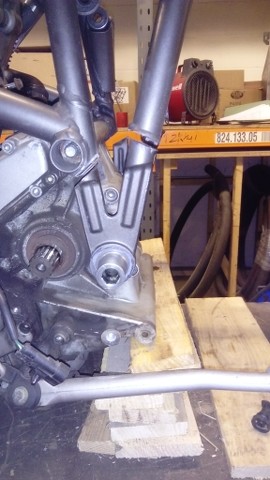
The swingarm pivot didn't line up with the frame so the angry grinder and cutting disk got another work out....

Image


The frame needed relieving where the rear cylinder cambelt cover fouled the frame...

Image


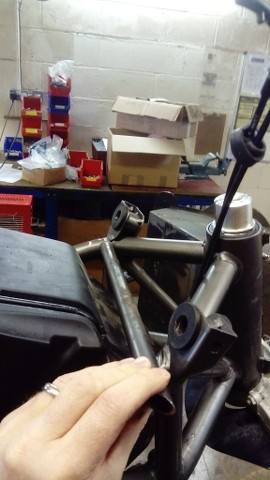
And a couple of cross members adding to replace the removed ones....

Image


Image


And, hey presto!

Image
 
This was all very exhausting. Exhaust-ing! Anyone? No?

So, my finger accidently slipped whilst browsing ebay and I bought a Termignoni silencer. This removes the mass of a small planet from right place on the bike and should help see maximum oooooomph extracted from the 1098 engine....

Image


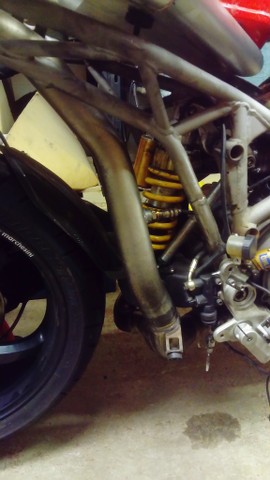
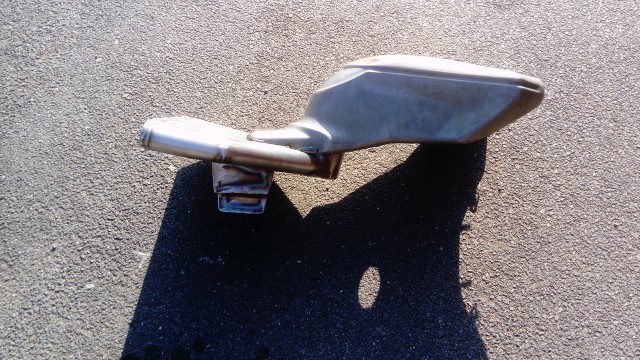
The 1098 headers needed matching up to the original 'strada link pipe so I took the bike and a collection of OEM Ducati exhaust parts from the 1098 and 'strada to JAC exhausts in Nottingham and he put them together with electric glue for me....

Image


Image


Image


Image


It's not perfect, and may yet see a trip to Racefit - who are just down the road from here - to tidy up the internals if the dyno shows it to be holding the engine back, but it looks sufficiently "factory" for me.

One of the main aims of the project is to end up with a bike that looks like it has come from the Ducati production line. If it were parked up I'd want the majority of people to walk by, thinking that it's another one of those ugly, old Ducati's, and only a very few to stop and start wondering why there's a radiator fitted to an air cooled bike....
 
Talking of radiators...
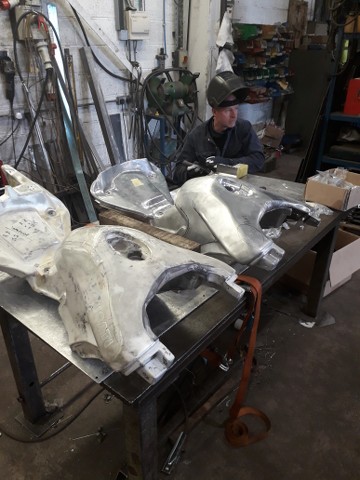
I'm not the first person to put a Ducati superbike engine into an original shape Multistrada, although I am the first to put the 1098 engine in (maybe that should have told me something...). Where I feel every other one has been let down is the radiator. They've either used the radiator that went with the superbike engine and it's been too wide for the frame and bodywork and they've cut slots in the bodywork to fit around the radiator....

Image


..or they've ditched the silencer under the pillion seat and moved the radiator up there (fucked if I know why either...), neither of which work for me and my desire to make it look "factory".

Having measured up a variety of potentially suitable radiators the best option, in terms of width and shape and looks, was the Aprilia RSV4 one. Nicely tapered with a relatively narrow width and trick looking double curvature. So 2nd hand RSV4 rad and oil cooler and belly pan was duly bought and then I took them and the bike to deepest darkest Abergavenny to see a mate who works for Saxon Motorsport as a fabricator so that he could work his magic...

He added new top mounts to the rad and made a pair of stays to support the rad and cooler...

Image


Image


..and a solid pipe that runs across the engine to connect the engine up to the rad in the correct flow direction...

Image


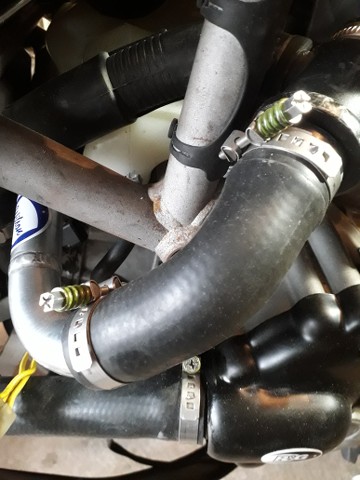
With the hoses held in place with the trickest hose clamps known to science, Oetiker stepless constant tension; as used by F1 & WSB teams...

Image


And he knocked up a nice little bracket, bolted to the sump, to support the back of the belly pan...

Image


With the radiator in place a heat gun was used to soften the fairing side panels so that they could be stretched around the radiator...

Image


Image


Image


...which I'm pretty pleased with.
 
And now we get to the part of the project that has very nearly broken me....

The fuel tank.

The tank on the 'strada is a monstrous affair, running nearly the whole length of the bike and supporting both the rider and pillion seat and holding 20 litres of fuel....

Image


It's a plastic (actually glass filled Nylon) tank, like most modern bikes and, like most modern bikes, suffers with issues due to the ethanol content in modern fuel.

I knew from the build threads online that the builders of the 749 and 999 engined 'strada's had issues with the tank clearing the airbox and rear cylinder head but that they had managed to cut or grind enough of the plastic away to get it to fit. But these engines were smaller than my 1098. So when I tried to fit the OEM tank over the 1098 engine, as shown in the photo above, it came as no surprise that it was miles away from fitting properly.

The amount of material that would have to be removed was more than just minor cutting and grinding, big sections of the underside would have to be removed.
 
My initial thoughts were to get a custom aluminium tank made, with the top side replicating exactly the OEM tank and the underside bespoke to suit the 1098 engine. I spoke to two reputable tank fabricators I knew of through bike racing, each working at opposite ends of the spectrum in terms of method of construction and customers they work for. AP Metalcraft make tanks for MotoGP, WSB and top flight factory BSB teams; they make tanks using bespoke bucks and formers and press the tank sections, which are as large as possible, in a huge hydraulic press and them weld them together in bespoke jigs...

1606331343464.webp


1606331424546.webp


1606331555741.webp
 
They were interested in doing the work. If I wanted to own the tooling (bucks/formers/jigs) it would be £11k for the first tank or £9k if they retained ownership of the tooling.

The other fabricator I contacted was Chris Ambler. Chris supplies many of the road racing teams and also a lot of the classic paddock with their tanks. He hand makes his tanks, using an English Wheel and hammers and bags to hand form the panels and this means that each tank is ever so slightly different. Chris, or who I thought was Chris (this will make sense later), looked at some photo's I sent him and said he'd be looking at £3.5k to make a tank. Still more than I was prepared to pay at that time, so I went back to the drawing board....

I thought about a composite tank rather than metal. I've got contacts with a leading fibreglass moulding company through my day job, engineering director of a rail industry parts and services supplier, so spoke to them about making a tank. Nope, they say, there's not a fibreglass system on the market that will withstand the ethanol in modern fuel for any decent period of time.

I'm not willing to entertain a carbon fibre tank; had too many negative experiences with c/f tanks, and their manufacturers, when I worked in BSB & WSB.

I looked at whether it was possible to produce a hybrid tank; keeping the OEM plastic top section and making an aluminium bottom section that fitted over the engine and was glued to the plastic. So I spoke to Loctite Henkel, again through work relationships, and the problem was, again, the Ethanol in the fuel. They didn't have an adhesive that was guaranteed to withstand permanent exposure to ethanol. Even if I glued the bottom on and then used a tank sealer like Caswell's it was still not a gamble I was happy to run with....

I'd hit a bit of dead end at this point. I was over at a Ducati breaker's in leicester a few weeks later and, while waiting for the owner to fetch my change, I was idly browsing a rack of Ducati tanks he had. I'm tapping them with my finger. *donk", plastic, *donk", plastic, *ting*, metal, *donk*.....wait a minute! Metal? Turns out the early 999's had steel tanks as Acerbis - who make all of Ducati's, end pretty much everyone else's, plastic tanks - hadn't got the moulds done in time.

Ok, so the 999 tank looks a bit like the front section, the bit between the rider's knees, of the 'strada tank and it's steel and I can fabricate - after a fashion - in steel so I took a punt and bought the steel 999 tank and had a go at using it as the basis for a custom 'strada tank. I spent several months working on it....

Image
 
So I decided that I was too far into the project to give up and had to bite the bullet and have an aluminium tank fabricated. I got back in touch with Chris Ambler (or the person who appears to be Chris Ambler on facebook. This will become clear in a moment...) and agreed on a price and a plan. I took the bike and the original tank up to Chris's, which is nearly in Scotland being near Penrith.

Get to Chris's, we reminisce about racing back in the 90's for a few minutes and then I get the tank and bike out the van. Chris comes over and says "fuck me, that's a BIG tank!". "Yes" says I "that's why I sent you all the pictures so you knew what you were letting yourself in for...". "Fuck me!" says Chris again, having started looking at the tank in more detail "That's a really complicated shape!". "YES!" says I "THAT'S WHY I SENT YOU ALL THE PICTURES.....".

"Oh" says Chris "That wasn't me you sent them to. I don't do computers. That was my brother-in-law"......

Fucking great. Anyway, Chris agrees to give it a go but he warns me that he won't be able to look at it until he's finished all the tanks for the TT. It's March at this point, so I agree to speak to him in June.

3 months later, I ring him. He hasn't touched it and is now balls deep in tanks for the Manx GP so won't be able to look at it until after the Manx in August. But, he reassures me, I still want to do it. Now, I understand that Chris has to keep his race team customers happy because they buy several tanks from him each and every year, plus all the repairs/modifications he does for them during the season and that making my one-off, never to be repeated, tank has to take a back seat to them.

But I'm miffed, to say the least. But I leave the bike with him and am resigned to another 6 months at least before I get the tank.
 
I'm updating the build thread on another forum and someone mentions there's a custom fabricator, going under the name of ETTO, over in Nottingham who makes custom aluminium tanks. I drop ETTO, actually a bloke called Ian, a message on facebook and explain the project and ask if, in principle, it's a job he'd be interested in? Oh yes, he says.

Although my 'strada is still at Chris Ambler's it just so happens that I have my cousin's poorly 'strada in my posession (it had just been to Nelly at Cornerspeed for a diagnosis of terminal valve seat recession, a common problem on early 1000DS 'strada's), so I loaded this into the van and drove over to Nottingham to see ETTO and let him see for himself, before he committed to it, just what he was letting himself in for.

He had a good look at the bike and tank and explained how he would make it, using the original tank as a former and hand forming individual aluminium panels over it, and how large and complicated it was. I offered to leave the bike with him for a few days so that he could give it a good looking at and be sure he was up for it but he said he didn't need to.

We agreed a price, £3.5k, and he said he would block out all of August and the first half of September to make it. In the meantime I would get all of the machined bosses and fittings designed and made, ready for him to weld in...

Image


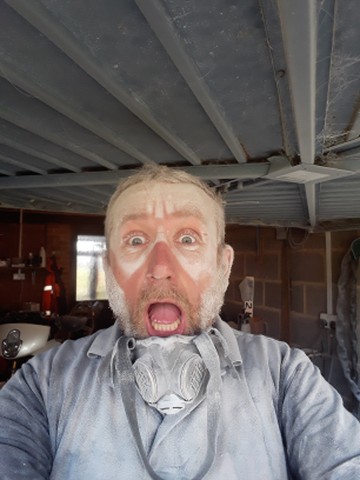
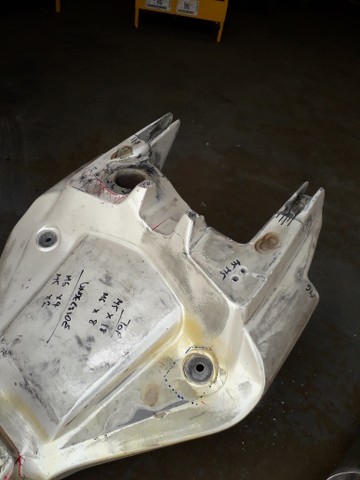
I reclaimed the bike from Chris Ambler and proceeded to fill my tank with resin, so that the aluminium sheet could be hammered onto it to form it, and attacked the underside with the angry grinder - making the world's own cloud of dust - to make it fit over the engine....

Image


Image


Image


Image
 
Last edited:
The bike, tank, machined fittings and the various parts that interact with the tank are all handed over to ETTO on the agreed date. I hand over 20% of the agreed cost as a deposit.

Initial progress looks promising. I go over to see him every couple of weeks and he's hard at work forming the panel sections....

Image


Image


Image


Image


...and Ian is full of enthusiasm for the job. Saying it's a once in a lifetime project, where he gets a chance to show off his skills etc.

But progress is slow, and I'm getting concerned. We get to the middle of September and there's barely half the panels formed. I express mild concern, more relating to Ian's income and him still being in business when it comes to the crunch, and asking if he wants some more money up front. No, he says, it's fine.

We get to the end of October and I'm getting really concerned now. There's 75% of the panels formed and some initial assembly started, but we're already at double the length of time he said it would take and it's not yet half complete. We have a frank talk and he says he seriously underestimated the length of time it would take to make and if he had to do it again he'd want double what he quoted....

Well, there's no way I was prepared to pay £7k for a tank but I didn't want to be a Guinness about it so I offered him 20% more - which I thought was generous - than he quoted, taking it to £4,250 and he agreed on that and we shook on it. I, again, offered to pay him some more of the cost to tide him over and, again, he refused.

So we get to the end of November and the wheels fall off in a big way....
 
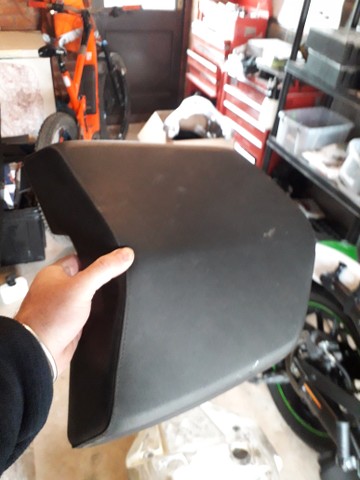
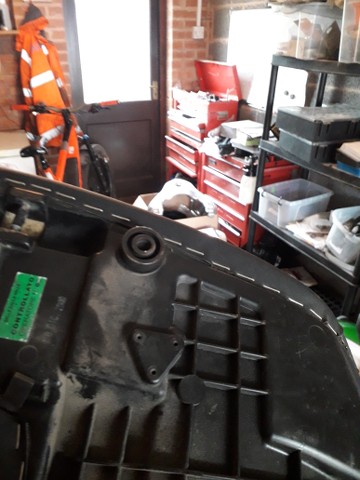
On the Multistrada the pillion seat squab....

Image


is supported, at the front, by the tank. The seat squab has rubber feet on the underside....

Image


...and these sit on the top of the tank. The brown witness marks on the original tank show where the feet land....

Image


So the back of the tank is supporting approximately half of the pillion's weight through that small area. Not a problem for the plastic tank, the material is bastard thick and plenty capable of transferring the load paths through the tank skin to the frame mounts. But this a problem for the aluminium tank; the skin is 1.5mm pure 1050 grade aluminium which, whilst easy to form, is not very strong at all.

I get a call from Ian late November. I can't make the tank to support a pillion seat, he says. I'll make it but you can't ever take a pillion on it. I explain, politely, that this isn't acceptable. I can't spend thousands of pounds on the tank and then take it home and show the missus and then casually mention that she'll never be able to go on the back of the bike again.

I suggest that I come and see him and we can work through the problem and come up with a solution. Ok, he agrees.

Before I go and see him I speak to a friend who works at McLaren (cars, not pushchairs) as a composites engineer and explain the problem to him and ask whether skinning the back of the tank in carbon fibre would give enough strength to support the pillion and take all load away from the aluminium. Sure he says, more than strong enough. I also rough out a design for an internal aluminium frame that would be load bearing to support the pillion seat.

Ring Ian just before I head off over to his. There's no point in coming over, he says. I've changed my mind and I'm not prepared to make the tank for a pillion, no matter what you say. He then goes on to suggest that if I want to carry a pillion I'd need to use a standard tank. I contain myself and, rather than pointing out that he's a fucking idiot, remind him the only, ONLY, reason I'm having the aluminium tank made is because the standard tank DOESN'T FIT OVER THE ENGINE. Oh yeah, he says.

He says he prepared to either give me all of money back and we both walk away or he'll sell me the panels he's made to date for a "nominal sum".

I tell him I'm coming over to discuss this with him face-to-face....
 
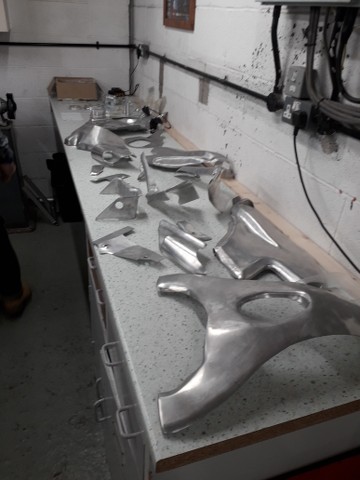
...get to his and there's this laid out on the side....

Image


Image


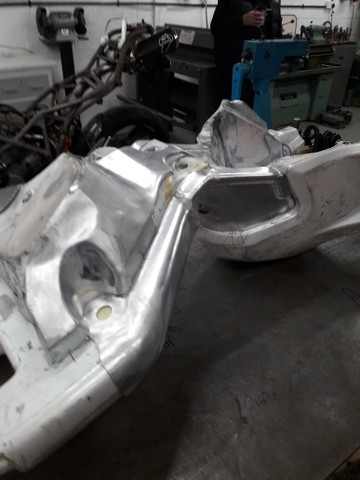
About 90% of the panels needed to make a 'strada tank.

He will not entertain any discussion regarding engineering solutions to address the pillion seat support, he's point blank refusing.

In the 2 hours since I spoke to him he's changed his fucking mind again. Now, it's either full refund and walk away or pay him £2k and he'll finish the panel kit and I can take it to someone else to have them make it.

I challenge him that this has got nothing to do with any concerns over the pillion seat support and everything to do with how long it's taking and the amount of money he's losing and how he cannot afford to carry on working on it. He won't admit to this, but doesn't deny it. Just changes the subject.

I say I need some time to consider options and I'll speak to him in the next 48hrs. I resist the urge to put him on his arse, partly because if I want him to finish the panels he needs to be able to work and also because he's an ex copper and they are Guinnesss when it comes to taking responsibility for their actions.

Much as I'd like to call his bluff and say give me my money back so he's earned nothing from me for all the months of work, and then destroy the panels in front of him, that won't get the bike on the road.

So I need to find someone to take on turning the panels into a tank....
 
So I personally have been let down by two, supposedly reputable, fabricators and I know of too many other stories of customers being let down by other "name" people in the bike industry. So I'm not sure who to go to with a view to them finishing the tank. I have a chat with Doug Cook, he of Garage 19 fame, as I know the quality of his work and he's done work for friends which they've been happy with. But while he's willing to give it a go he's never done something like it before, he'd be doing it in his spare time and, logistically, it'd be difficult as he's in East Anglia and I'm in the Peak District...

Then I realise I'm a fucking idiot. I don't need a specialist bike fabricator. I need a proper, professional fabricator and it doesn't matter what industry they work in.

And I use a local fabricator to make all of the metalwork for our rail products. He's never let us down. The quality of his workmanship is 2nd to none. We've had his welding tested by 3rd party testers and it always passes. And best of all he's a mate and he rides motorbikes.....

So I give him a ring while I'm driving home from ETTO. He's up for it, and what's more it turns out later that he's up for a deal; rather than paying him cash money for the work I give him my YT Jeffsy MTB in exchange. Works for me as I was trying to sell it to fund my new Trek mobility bike....

I collect the completed panel kit from ETTO, accompanied by a martial arts instructor mate to keep me in check if Ian starts being a Guinness, between christmas and New Year and we get stuck into turning the panels in to a tank...

Image


Image


Image


Image


Image


Image
 
Putting the panels together has been a far more arduous and lengthy process than either myself or Martin, the fabricator, had anticipated.

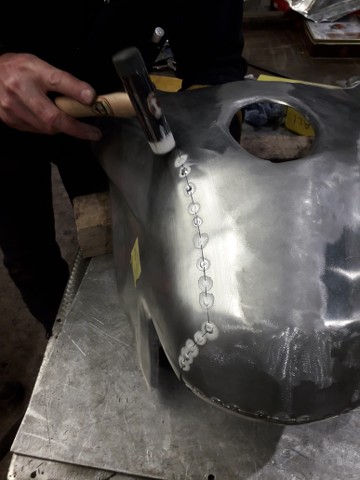
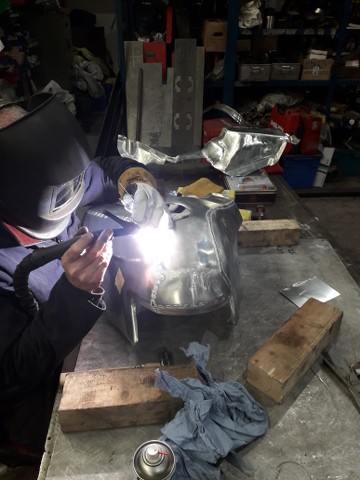
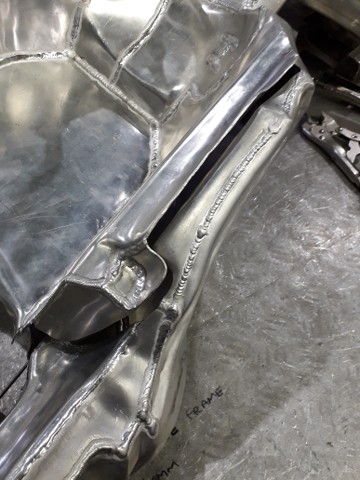
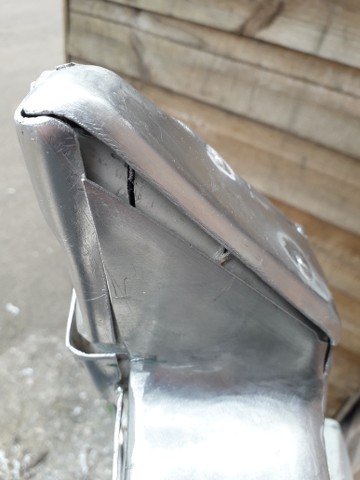
Matey boy at ETTO had formed the individual panels over the original tank but very few of them had been welded together before he bailed on the project. To his credit the majority of them have been pretty true to the shape of the tank they form, but each one requires a painstaking and laborious process of filing, tweaking - either with bare hands or with hammers and dollies, tacking, fettling and welding to the adjacent panel. This takes a looooooong time.

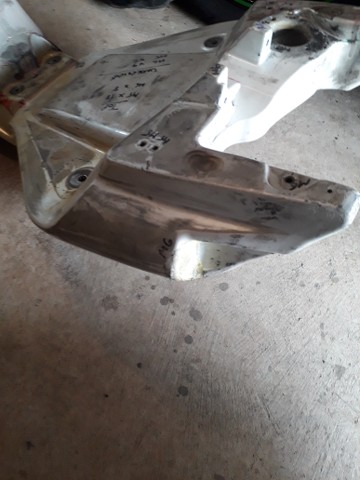
Take for example the left hand "Cadillac wing" section of the rear of the tank. Here's the original....

Image


...and here it is reproduced in metal...

Image


Image


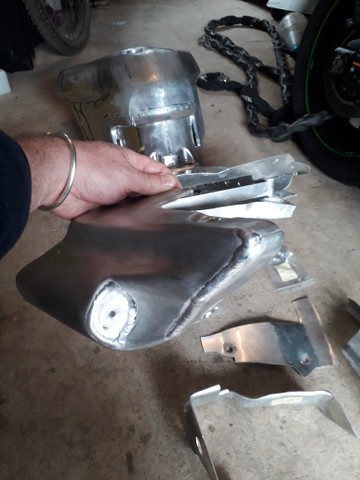
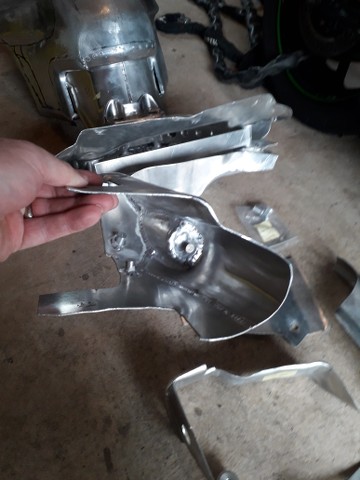
That's 4 individual panels and 6 machined bosses that had to be assembled. It took the two of us a day to produce, about 15 man hours for one small part of the tank, and a part that's hidden under the pillion seat and seat panels when the bike is built.

And because of all the welding that was done, even through the individual panels all were conformal to the original tank shape, the whole assembly now requires hours of dolly work as the profile where the assembly meets the main tank has been completely lost....

Image


I can do a lot of the panel forming but the welding is beyond me and my skills because of how the panels have been formed. The panels have all been hand formed - where the aluminium has been annealed to soften it and then worked with hammers and the like to form it into the shapes needed and as it work hardens from being formed it has to be annealed again and worked and so on - so the material thickness is not constant as it's been stretched thinner to different amounts in some places and bunched up and made thicker in other places.

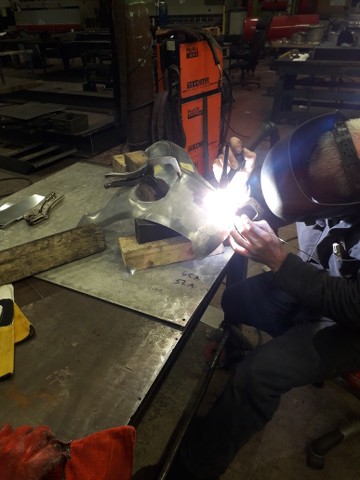
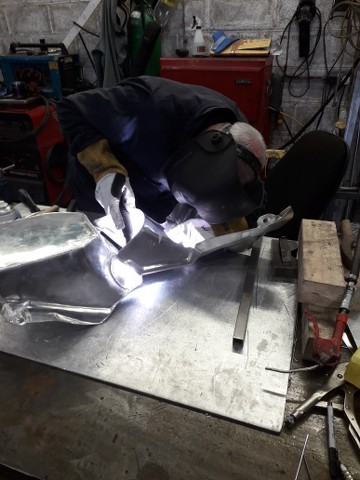
So the weld plant settings that worked for 10mm of welding suddenly become wrong for the next 10mm and you either blow through or don't get enough penetration. So Martin is constantly adjusting the settings as he sees the weld getting away from how he wants it. That's why the filler cap receptacle took 4 hours to weld in, there was probably 400mm of welding, inside and out, to attach it to the tank skin and I reckon Martin had to tweak the welder 50 or 60 times during that. Plus, because the receptacle is a machined piece with much greater mass than the skin, he was constantly having to stop and tickle the receptacle with a gas torch to bring it's temperature up so the heat from the arc didn't get lost in burning through the skin before the receptacle metal started to melt.

Image


Image
 
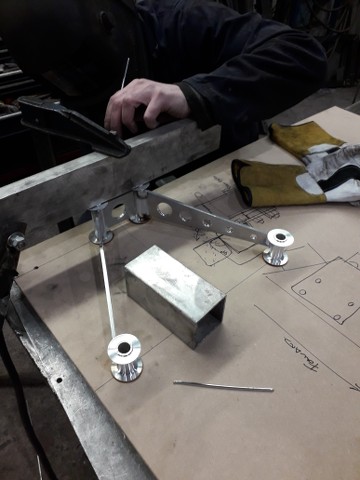
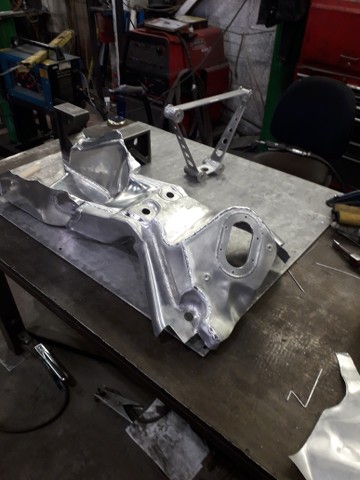
To support the pillion seat we've made a structural frame that sits under the rider's seat.....

Image


Image


Image


And then once the back section of the tank is tacked together and tacked to the front section we'll drop the tank on the bike and figure out where the pillion seat rubbers will land and then weld a supporting frame under the skin to the frame.

Other parts of the fabrication.

Welding the fuel pump mounting bezel in....

Image


Image
 
The tank has reached the stage where we've got to tack the underside to the top so that we can get the last of the front panels in place and welded....

Image


Image


Image


Image


The we cut the tacks and remove the top.

This is what's left to complete the rear of the tank...

Image


Image


...and then, due to the unique shape of the tank, there's a complex set of internal breather, vent and balancing pipes that need to be formed and welded in before the top and seat pan is finally welded in....
 
The one thing, the one fucking thing, that ETTO had to do was make the tank so that it fitted over the engine. The original tank underside was modified to fit and leave clearance to allow for the 1.5mm extra thickness of the aluminium skin to be formed over it so all he had to do was replicate it.

Guess what?

It doesn't.

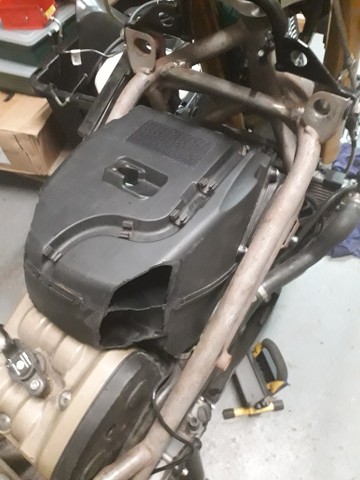
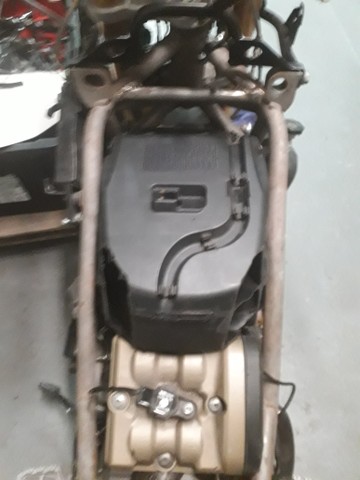
It fouls the air box. When we found this we were too far into tank fabrication to modify it. So a new airbox is needed. This is how much needed to be removed from the airbox to allow the tank to fit over the top...

Image


Image


A pain in the arse, but not the end of the world because it potentially allows some more power to be got from the engine. Those that are in the know say that the 1098 engine is held back on power, comparatively, due to two issues associated with the OEM airbox; it's too small and doesn't let the engine breathe and the injectors - which are mounted in the OEM airbox lid - are too far away from the inlets.

Felix at 2moto has managed to get an honest 162bhp at the wheel from a standard 1098 engine and a large part of this was down to making a custom airbox and mating V2 Panigale inlet trumpets and injectors (on the Panigale the injectors sit in a frame that's part of the trumpet)....

Image


So, for a donation to his beer fund Felix gave me the CAD models for the mating plate that allows the Panigale inlet trumpets to be fitted to the 1098 throttle bodies and I bought a complete V2 Panigale air box and throttle bodies from ebay.

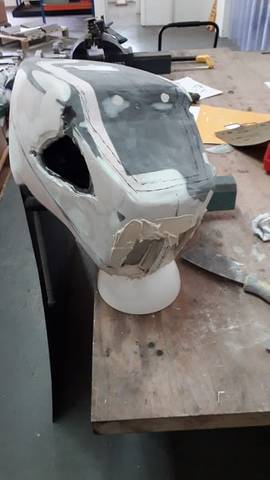
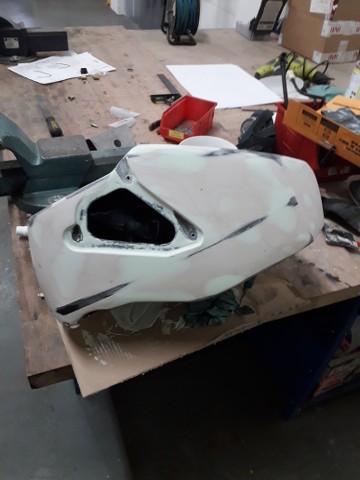
I'm now using all of the body filler in the world to turn the original air box into a plug mould, making it larger where possible.

Image


Image


I'm debating whether to have a go at some, all or none of the mould making and moulding myself or to let someone else do it.
 
Engine wise, I'm going to lighten the flywheel and have a sprauncy new STM slipper clutch waiting to go in....

Image


I'm trying to persuade someone from another forum to sell me a pair of Pistal hi-comp pistons that he's had sitting around unused for several years. I've made a somewhat cheeky offer before all this virus cobblers started but have heard nothing back and he's a bit flakey when it comes to communicating with people.

The engine will go to Nelly a full service and check over and he'll chuck the clutch, and hopefully pistons, in as well.
 
The damping of the steering...

With the bike on it's original 2V engine I had it set up the way I like it for steering but this meant the front end got a bit flighty when hard on the gas. It got a bit slappy when the front end was light and there were bumps in the road or the front wheel wasn't perfectly straight. With nigh on double the power I felt some form of steering damper was going to be essential if I didn't want to be flung off the bike.

There were a limited number of Ducati Performance branded steering damper kits sold for the original 1000DS 'strada. But I discounted using one of these, even if I could find one as they were long out of production, as it uses the handle bar clamps to mount the damper - 916 style across the front of the tank - and, unlike the 1000DS's solid mounted bars, the 1100S uses rubber mounted bars.

I had a look at trying to mount a more conventionally operated side mounted damper but there just wasn't the space available, particularly with my new huge radiator fitted. A rotary damper, like a Scotts or Ohlins, was also considered but would have needed a new top yoke with wider spaced bar clamps and I couldn't see how to create the mounting on the frame for the actuating arm.

However, I was up at Cornerspeed and whilst idly browsing the variety of machines in for work I noticed a very nice Monster 1200 that had a steering damper fitted in exactly the same manner as 1000DS kit AND it had rubber mounted bars. A quick chat with Nelly confirmed it was an official Ducati fitment so the Ducati Performance 1000DS damper was an option.

I posted on Multistrada.net, asking if anyone had one for sale or could point me in the right direction of one. Fuck me! You'd thought I'd have asked for directions to the granny's house as I wanted to rape her!

Got called every name under the sun, told I must have a problem with the bike/tyres/tyre pressure, was doing everything in my life wrong, was an abject failure etc. as the 'strada doesn't, no way no how, no sireee, not ever, need a steering damper. I tried to point out that I did know what I was doing and it was for a bike that was far from standard, to no avail. Apart from one member who said he had one, unused and never fitted, that he'd sell me.

Money duly changed hand and it arrived. The damper needed a service as it was full of air. The damper itself is made for Ducati by an Italian company called FG Gubellini (no, I'd never heard of them either...). I tried all the usual suspects in the UK, MCT/Ktech/Kais/100% etc., and none of them worked on them so I resigned myself to having to try and deal with FG Gubellini direct. Well, that was a pleasant surprise. Prompt reply to email enquiry, posted to Italy, email acknowledging arrival, email update on workshop investigation, invoice, receipt, despatch note and back 3 weeks later.

Because the 1100S has the previously mentioned rubber mounted bar clamps the bars are higher, in relation to the frame, so the damper is also when fitted...

Image


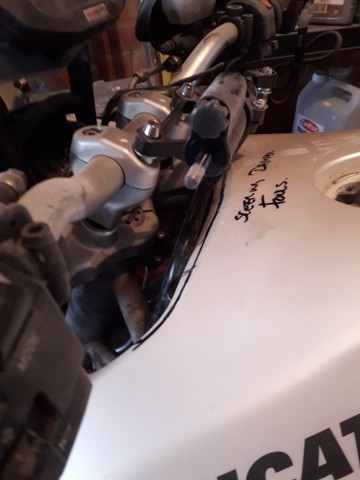
...which pushes the whole set up backwards and it fouls the front of the petrol tank....

Image


So it's a good job I'm hand making a custom aluminium tank that can be modified at the front to clear the steering damper isn't it?

Well, that's what I tell myself as I lie in bed at night, sobbing and unable to sleep, as I think about what the fuel tank has cost me in time, money and sanity....
 
More work on the tank, managed to squeeze in a few hours this afternoon.

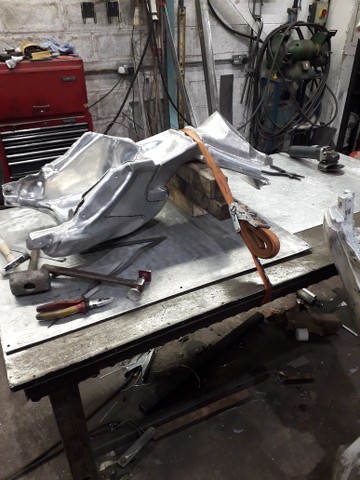
The fucking thing was fighting back, so we tied it down. That'll learn the bastard.....

Image


Trying to get the tank bottom lined up with the top and getting the corner piece fettled and in place, ready for welding. This is where we were at the start....

Image


After lots of this...


And this....


And some controlled aggression when persuasion with hammers wasn't enough...

Image


We end up with this...

Image


...ready for welding on Thursday when we resume.
 
Another few hours fettling and the top now fits the base perfectly.....

Image


Image


Image


Before we went any further we did some checking of critical dimensions, comparing the new metal against the original plastic tank. Amazingly we've managed, despite not having any jigs, to be within +/- 1mm. Which is nice.

We then started work on the rear section....

Image


Image


Called it a day at half six. There's probably 30 or 40 more hours work to do to complete it, maybe another 3 or 4 weeks until completion.
 
Took the tank to the workshop and tried it, for the first time, on the bike and with the fairing panels it joins with...

Image


Image


Image


The good news is the fit with the panels is absolutely bob on, the profiles and mounting holes line up as well the OEM tank...

Image


Image


Image


Image


Image


The not so good news is that, even on a bike as "old" as this, CAD allowed the packaging to be very tight when the bike was originally designed and assembled. Because the aluminium tank is about 2mm bigger in all dimensions than the OEM tank - the thickness of the aluminium skin formed over the OEM tank is 1.5mm and it'll never be perfectly conformal with no air gap anywhere to the former - there are issues with the OEM brackets at the front and the top yoke kisses the tank on full lock and the steering damper bracket still fouls the tank. The last one is actually my fault, despite taking away material at the front of the OEM tank to clear the damper I forgot to allow for the thickness of the aluminium skin.

All solvable; new front mount brackets will be simple to knock up, some gentle hammer work with give the clearance around the top yoke and some modification to the steering damper bracket - cut and reweld the reaction arm at slightly different angle - should do the trick....
 
Managed to get a few more hours in on the tank with Martin on Thursday, working on the rear section.

It's the most complex shaped part of the tank....

Image


And is at stands now, in metal. There's 11 separate panels, plus a load of machined bosses and fittings that go into it...

Image


After a promising start we hit problems, when we started tacking more of the panels together we couldn't get them to meet AND have the correct shape. Something wasn't right.

Because some of the bosses have been welded in already the panels won't fit back over the former as it was. So we called it a day and I took the former back to give it a seeing to with a variety of drills and cutting tools to chop out all of the parts where the bosses are so that the panels could be put back on the former and we could figure out what was going on.

With the panels on the former....

Image


....the problems become obvious...

Image


Image


Image


The man from ETTO has fucked up. Can't pretend to not be dissapointed, given how well the other panels have fitted, but it is what it is. I suspect what we're going to have to do is cut back the offending panels, as the gaps are too large to be filled with weld and too small to be filled with strips of metal, and weld in small infill pieces.

They wont' be visible when the bike is assembled and they're not in any particularly stressed/load bearing areas.
 
Back
Top Bottom