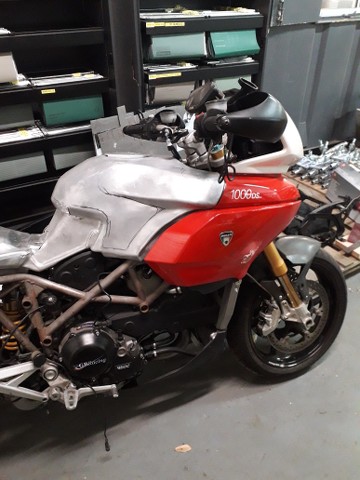
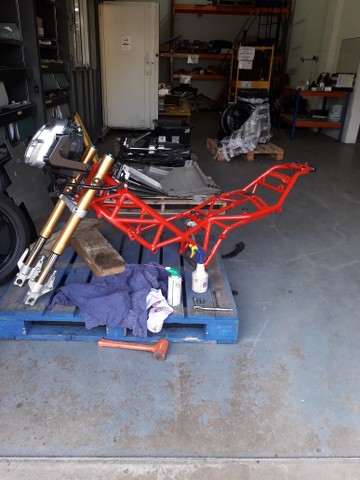
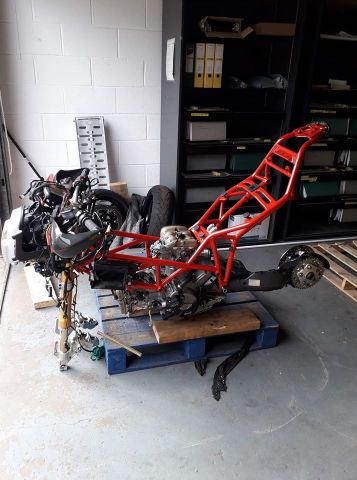
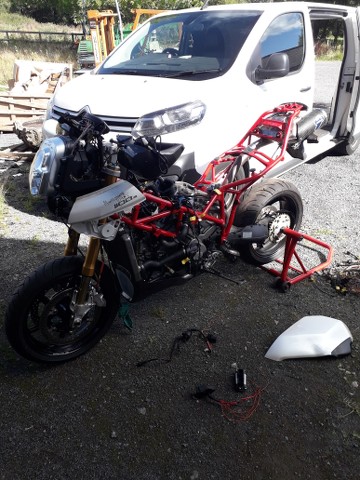
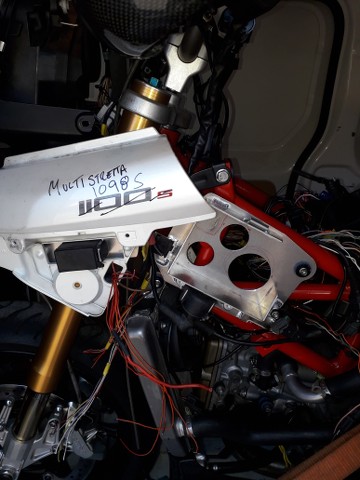
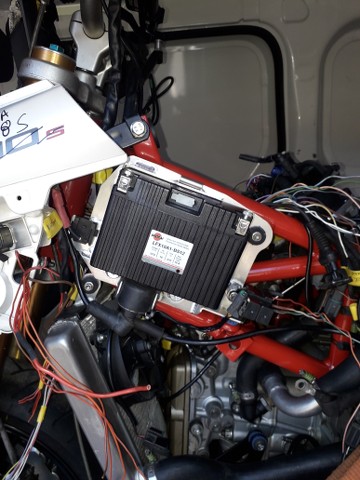
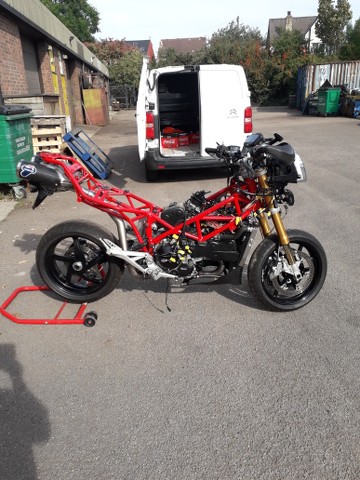
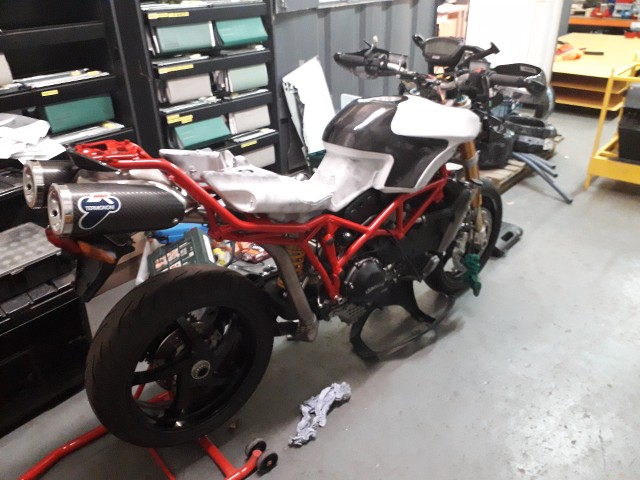
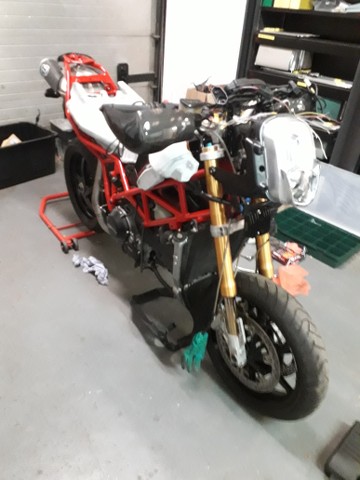
Ducati Multistretta 1098S

Sometimes in life we get to spend time in the company of, and see them working, folks are at the very top of their game.

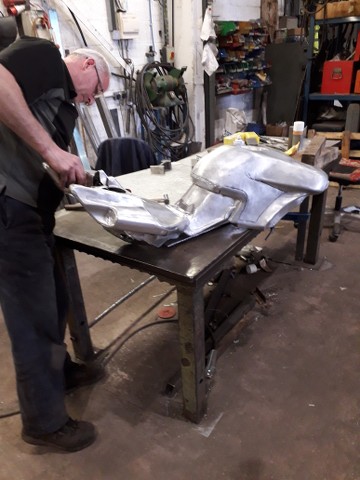
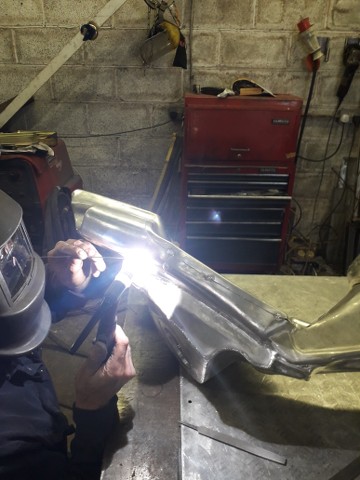
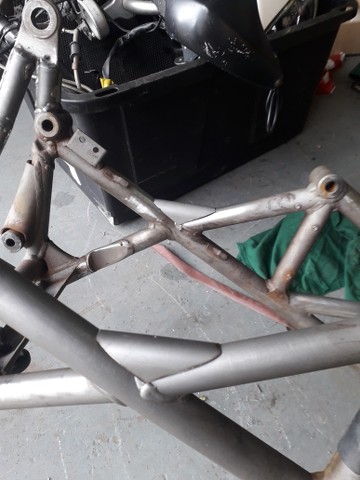
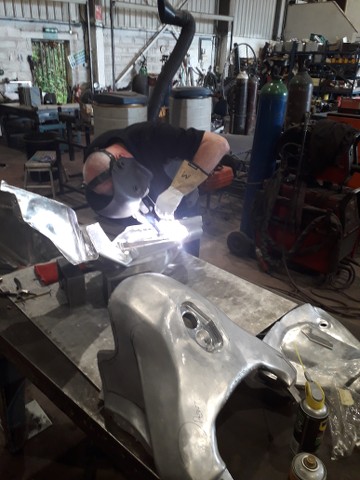
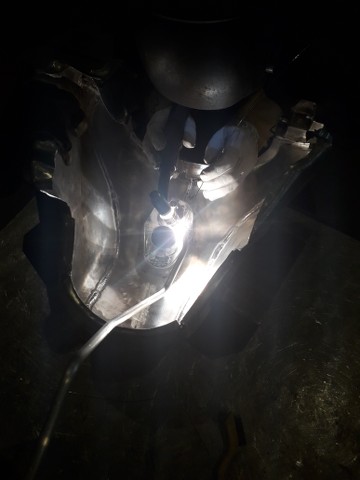
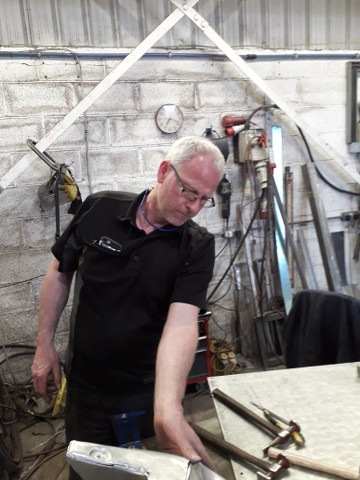
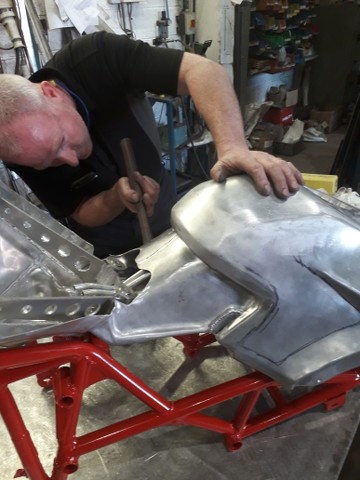
This is Martin Linethan of F1 Metal Fabrications in Staveley, Chesterfield...
Image


Image


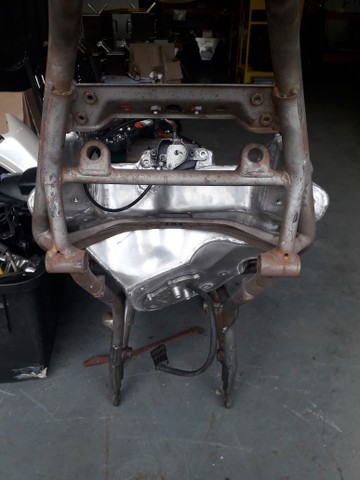
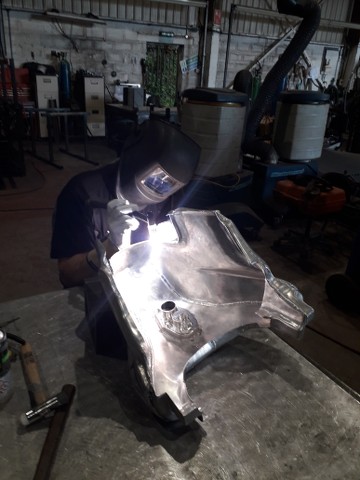
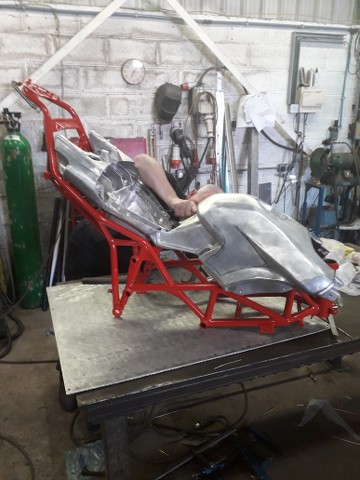
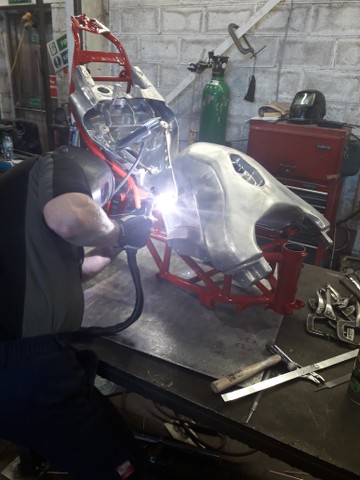
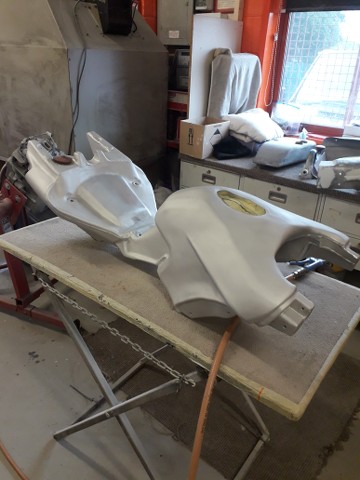
..and watching him this afternoon, work for 4 hours to recover the rear section of the tank, was truly pleasurable.

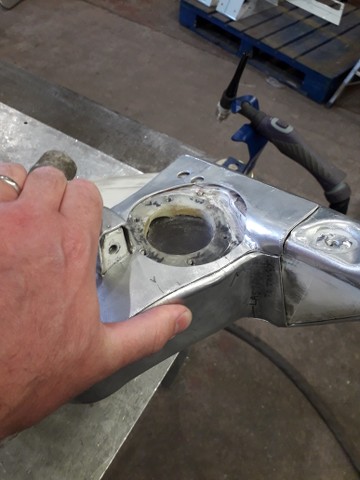
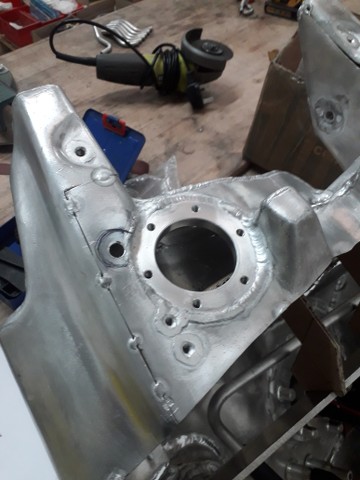
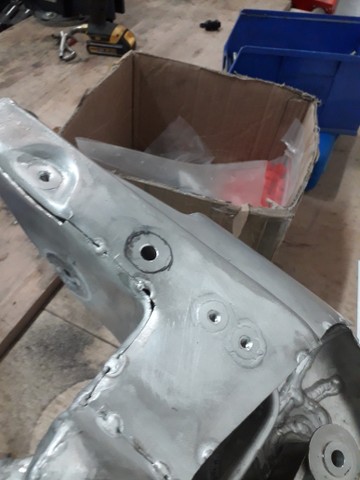
He managed to reform and stretch the panels so that 2 of the 3 problem areas, which I had thought needed extra panels welding in, were sorted without the need for extra welding...
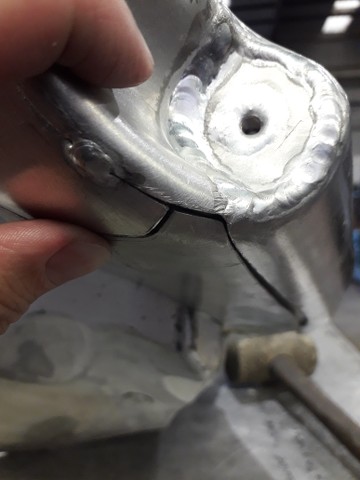
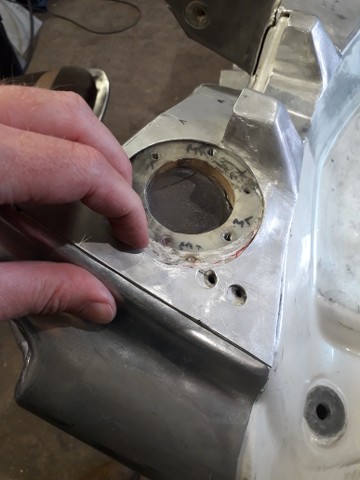
Image


Image


Image


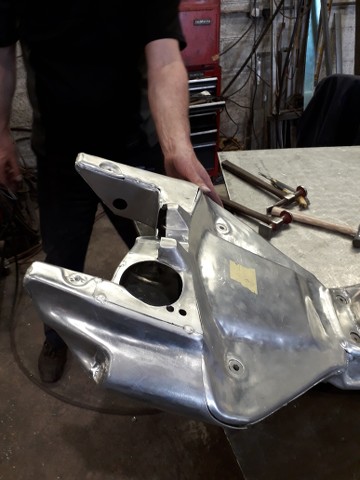
The one area that needed a new panel welding in was done with no problems and the whole rear section was tacked together...

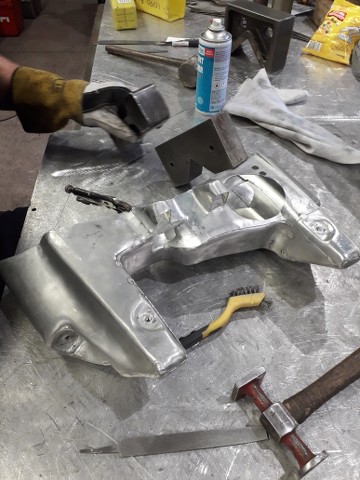
Image


Image


..and offered up to the back of the rest of the tank....

Image


Image


A fantastic result.
 
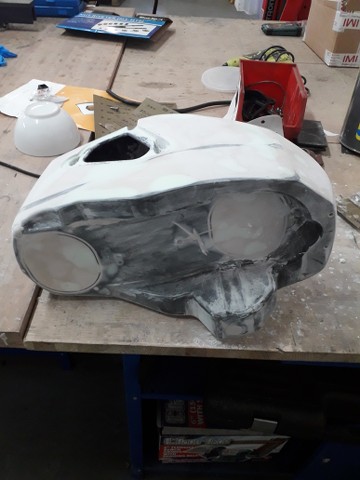
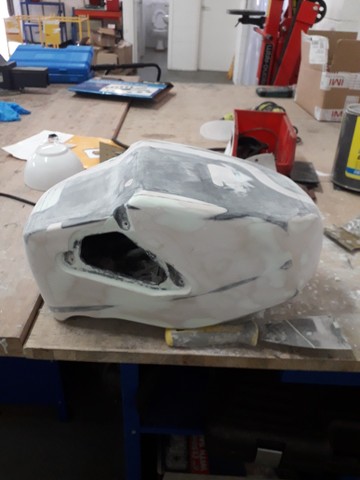
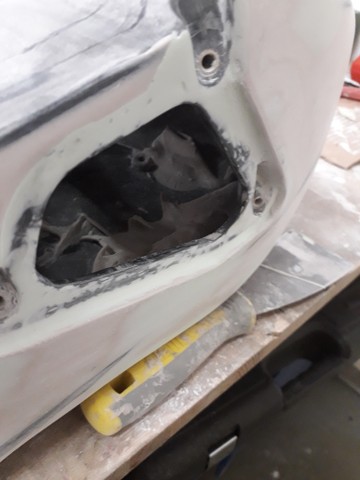
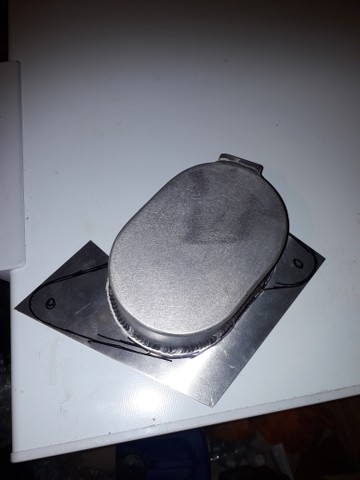
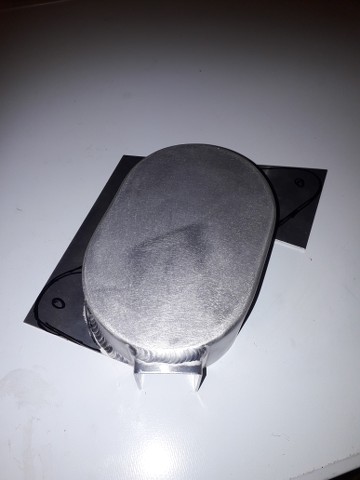
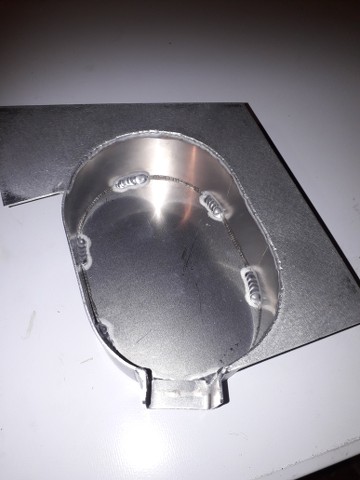
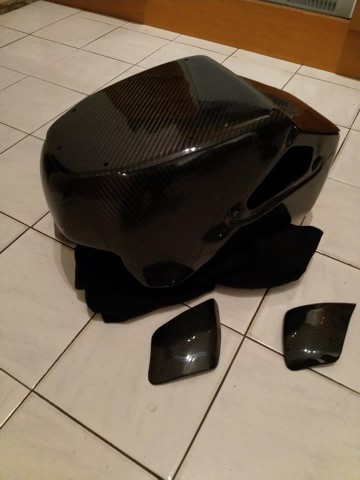
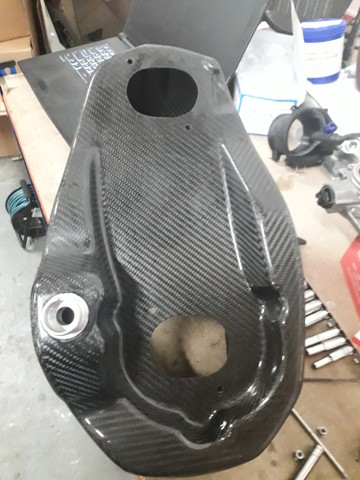
Air box plug finished...

Image


Image


Image


Just needs a coat of grey primer and then it's going to be sent down to Essex so that a mate can 3D scan it.

He'll email me a mesh file of the scan, which I can import into Solidedge CAD and then produce a full CAD model.

Got the contact details of someone who's a friend of a friend who works at a 3D printing company, so going to have a chat with him about the printing process.
 
No work on the tank this week, Martin and I weren't able to get clear diary time simultaneously. Normal service resumes next week.

Air box plug is now in Essex being scanned. Spoken at length to contact at 3D printing place, turns out they've printed airbox's for BTCC and other motorsport applications and there won't be an issue with printing mine. Result.
These bad boys have arrived....

Image


So I'm going to book the engine in at Cornerspeed as soon as he's got a slot available.
 
More tank work...

Image


Image


Image


Back end is now fitting like a dream and tacked in place..

Image


Image


But now the whole tank is together many of the panels in the rear section that are tacked in need to be cut out so that we can work inside the tank to get the breather pipes and the pillion seat support structure fabricated and welded in.

Then the whole thing can be fully welded and checked for leaks...
 
Apologies for the lack of updates, me and Martin have been busy with our day jobs.

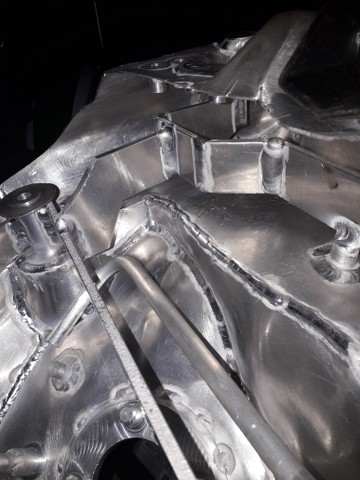
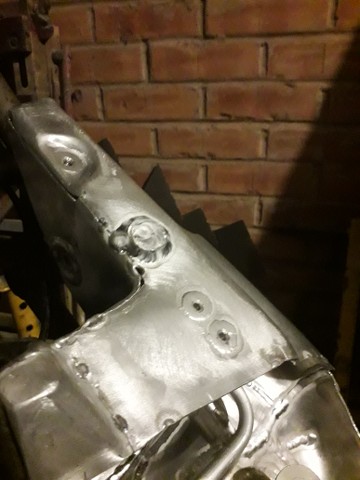
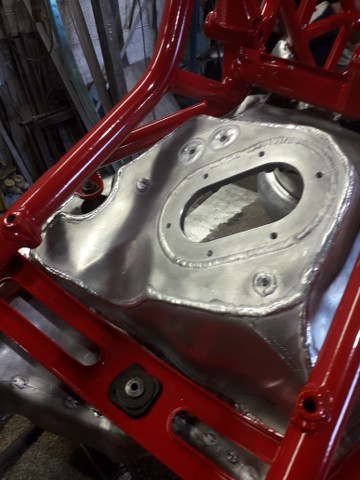
We got an afternoon in on the tank last week, so all the mounting bosses and other gubbins are all welded in and we spent a lot of time tweaking the overall shape of the tank to make it as close to a perfect fit on the bike as we could...

Image


Image


Image
 
Dropped the engine off with Nelly at Cornerspeed for him to do the voodoo that he does so well. Also chucked in the swingarm, for new bearings, and the rear shock, for stiffer spring and a new remote preload adjuster hose. He reports that supply of parts and consumables is becoming an issue; Ducati UK have been supplying to all orders placed with them, irrespective of where in the world the customer is based, and Ducati HQ have not been sending out any meaningful quantities of new stock - presumably because their supply chain has been decimated by results of lockdown etc. in Italy. Nelly is a Motul devotee and can only now buy oil in 44 gallon drums and anti-freeze is rarer than rocking horse pooh. Hoping for 3 weeks or so for the work to be done.

This post was originally written in the middle of the first lockdown and the supply situation is no longer a problem

I also went over to the other side of Mansfield to visit a paint shop, recommended by a Harley riding delivery driver who regularly delivers to work and who has taken an interest in the Multistretta since it has been in the factory, called Vale Paints. Liked what I saw there and they're going to powder coat the frame, bead burnish and lacquer the tank (I'll scotch brite it to give it a brushed look between the burnishing and the lacquering) and paint the bodywork.

I told the guy who runs the place that I was looking for the paint finish to replicate the factory quality; he said he can't normally paint that badly but he'll give it a go........

Going for flat black bodywork with white and red logo's.

They had a fibreglass bodied car in the paint bay having all of its trim refitted after painting. The back end was peeping out and I thought it was an E-type but it turned out to be a "Rotherham". Made in the 1950's it had a full fibreglass body with no chassis, the suspension and engine and everything else bolted straight to the body. Designed by an aircraft engineer and the one they had is the only one that's still with the original owner. Never heard of them, has anyone else?

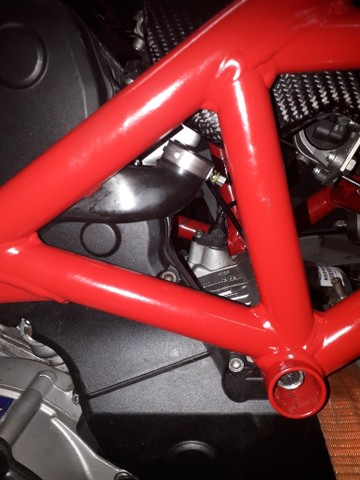
Going to pause work on the tank to finish the frame next week, welding in the cross-members and mounting brackets that had been tacked in and adding a couple of gussets to strengthen the frame between the engine mounts (a known weak point when you start chucking serious power out), and then drop it off for powder coating.
 
Last edited:
Finally managed to get the CAD model of the airbox over to the 3D printers. They came back with a price and it was a lot more than I was expecting, in fact on a par with the carbon fibre option. I had been expecting the printed option to be significantly cheaper, based on a comparison between CNC machining and manual machining costs, but the printers explained that the printer they'd be using - because of the size of the airbox - has to use material that can only be bought from the printer manufacturer and it is expensive when compared to other, more readily available, material.

So, I'm going back to the carbon fibre option for the airbox. Because it's proven for use in the application and, well, because carbon fibre...

Spent a few hours at work this morning getting the frame ready for final welding this week. Oooh, me gussets....

Image


...reinforcing the frame in a known weak spot when you start pumping some serious power out.
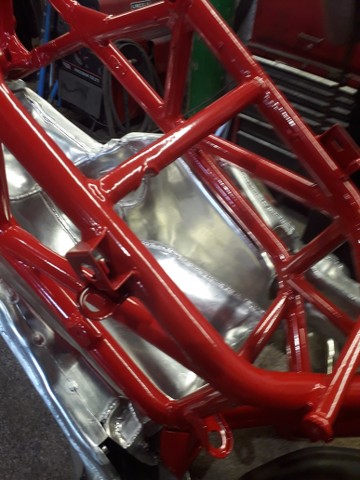
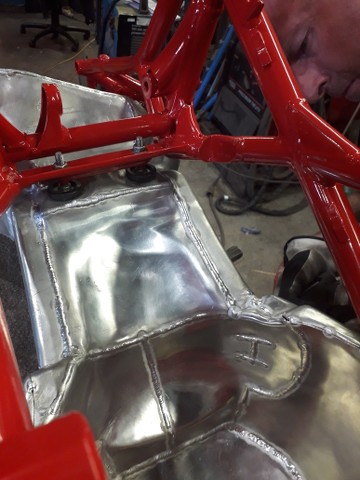
On to the tank. Checked the fit of everything under the pillion seat, it's a busy old place to be with seat hinges, breather valve, vapour recovery tank and all the pipework....
Image


We've started working on the breather tubes and pipes under the seat...

Image


...and the pillion support frame, with the aid of the other kind of CAD - Cardboard Aided Design.

The back of the tank sits on a cross-member on the frame and there's an M8 threaded boss welded into the tank underside which is used to bolt the tank down....

Image


And the pillion seat squab sits, on rubber bumpers, on top of the tank where the black circles are...

Image


Image


So knocked up a couple of 6mm thick aluminium discs with 8.5mm holes through the middle, which will be welded to the tank top where the bumpers sit...

Image


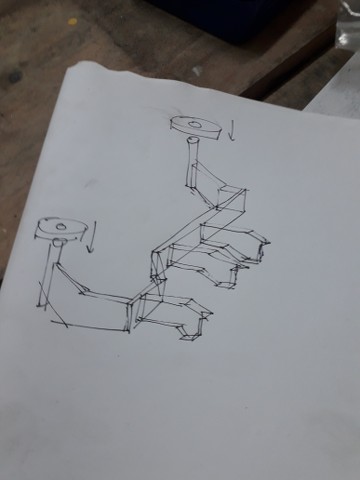
The plan is to fabricate a frame from 6mm plate aluminium that is welded to the back of the rider's seat support frame and also sits on top of the M8 boss at the back of the tank....

Image


The dog leg in it is to clear the breather valve. There's holes in the tank top and the plan is to weld 8mm dia round bar to the ends of the support frame legs and these will run up through the tank skin and the discs....

Image


...and the round bar will be welded to the discs, but not the tank skin. So the forces from the pillion seat go into the support frame and then into the bike frame, and not through the tank skin.
 
Frame is now finished. All the tacked in pieces are fully welded and the gussets are in as well...

Image


...the frame's going to have a quick shot blast at a place round the corner from work and then all being well it'll go for powder coating Wednesday.

Made good progress with the tank.

The support frame is in, as per the sketch.....

Image


With the round bar uprights running up through the tank skin...

Image


And the round discs welded to the tank skin and then the round bar welded to the disc....

Image


The top face will get linished flat. There's two more plates to be welded between the pillion seat support and the rider seat support frame and then the internal load bearing work is done. We'll cut the tacks that are holding the front top section on to remove it and this will allow the dents to be hammered out from the inside and the two breather pipes from the filler to be bent and welded in.

Then it top back on, flexible hoses clamped down, seat pan on and everything fully welded. Two more weeks I think/hope...
 
The frame is back from powder coat. The paint shop rang me this morning to let me know it was ready for collection but unfortunately I was already at Martin's for the penultimate - fingers crossed - tank fabrication session so I'll pick it up in the week.

The second hand 1098 flywheel courtesy of ebay arrived on Monday so I borrowed 20 minutes on a friend's lathe and turned it down and shed nearly half a kilo in weight in the process. Dropped that off with Nelly for him to throw in the engine and also got an update on engine progress, all good and should be finished this week.

Tank work this morning. Cut the tacks holding the top in place and removed it. Knocked all the dents and high spots out. Finished the pillion support frame and got the last remaining threaded bosses welded in....

Image


Image


Fully welded the top section, inside and out, so that can be fully linished so the welds disappear...

Image


Image


Image


With that done the breather and drain pipes could be welded to the filler cap receptacle...

Image


Image


And that's it. Ready for final full assembly.

Next Saturday, we're working until it's finished.
 
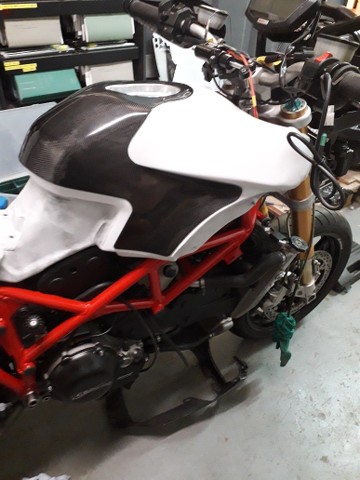
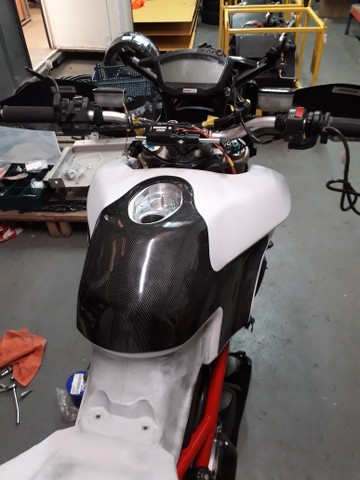
Two years and too many thousands of pounds later, the tank is complete (other than leak testing, bead burnishing, scotch briting and lacquering). All done Thursday night...

Image


Image


Image


Image


Image


Image


Image


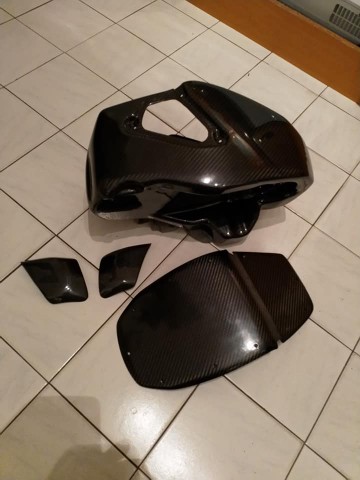
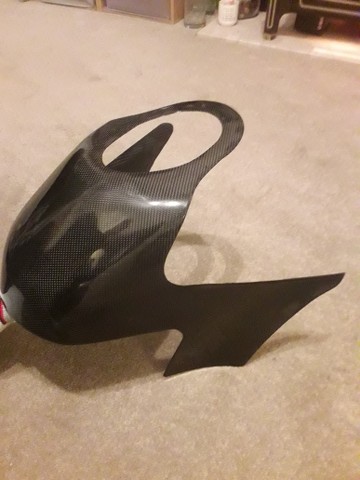
Tank is now with the carbon fibre man for him to make the tank protector pieces and then once he's made the moulds it'll come back and do the leak test and then hand it over for prep and lacquer.

Picking up the engine Thursday and get on with building the rolling chassis.
 
Slow and steady on the build, the gold Ohlins looks sooooper against the red frame...

Image


...had all the brackets, old and new, powder coated black and they look totes amaze.

Picking up the engine and swingarm (new bearings) from Nelly in the morning. The shock isn't done yet, it's taking an age for Ohlins to come up with a new hose for the remote preload adjuster, so I can't get it on its wheels just yet.

Had a parcel from Matt Bennett (kannerdog1x1 on PBmagforum) waiting for me when I got it. He's fabricated a shroud to go over the fuel pump on the underside of the tank, as it sits - even with the hugger - right in the stream of clag thrown off the rear tyre. The original Multistrada one is no use as the 1098 pump is markedly different to it. There's a couple of tapped bosses welded into the tank bottom to secure the shroud..

Image


...and Matt's done his usual, outstanding, job of making it...

Image


Image


Image


...when I get the tank back from the c/f dude it'll get trimmed to suit, somewhere about the black pen lines sketched on the shroud at the moment.
 
Not on its wheels yet...

Image


...as I'm still waiting on the rear shock to come back.

In a true definition of irony I, as the engineering director of a hoses and fittings business, am waiting on the hydraulic hose for the remote preload adjuster to be made. The hose that I could get made in a matter of minutes, but because it involves opening and bleeding the hydraulic adjuster I thought it would be easier to get Nelly to do the swap and now he's being messed around by the hose company he's gone to.

Started work on the wiring loom. OEM looms are hateful things, and 10 year old looms even more so. When you strip the sleeving and tape off every single individual cable is covered in sticky crap and the cable routing and jointing is utter dogshit...
 
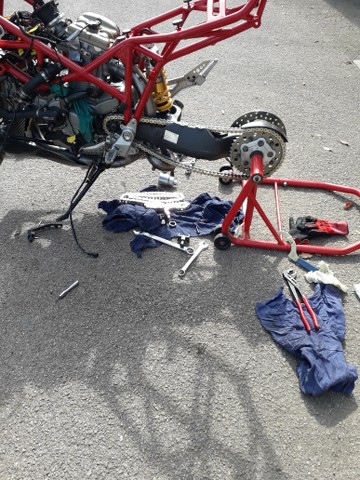
Still not got the original shock back, so I bit the bullet and ordered the latest in MotoGP, anti-squat technology, rear suspension supporting device....

Image


...which allowed me, with the aid of the forklift, to get it back on its wheels and start putting it back together.

Image


...and get the harness - now with all connectors identified and labelled and stripped back - laid out in place and work out what needs moving where...

Image
 
Spent the day, yesterday, in deepest darkest Abergavenny.

The Ducati basking in the sunshine outside the workshop...

Image


..and the fruits of our labours....

Image


Image


..battery and electrics tray and fuse box mounting adaptor. They'll be off for powder coating this week and now I know where everything electrical is mounted I can crack on with the loom.
 
Went over to work and dragged the bike out into the sun....

Image


Got the shock in and fitted the chain...

Image


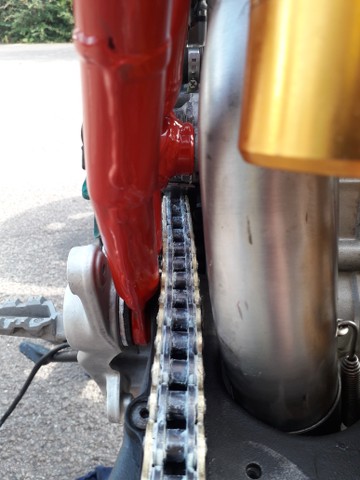
..and I was turning the chain over by hand to check for any tight links I couldn't help but wonder why it was very notchy as it moved and why was there loads of red flakes on the outer side plates?

Ah bollocks!

Image


Image


The 530 chain doesn't clear the inside of the frame. Oh well, I'll strip the bike down in the morning and cut away the inside of the frame and fabricate some capping plates to weld in. It also gives me a chance to sort out a few niggles I had with the frame and add a boss for the steering damper reaction arm - getting rid of the clunky clamp the original kit uses - and some more bracing around the headstock.
 
Got a call from the paint shop to come and have a look at the tank.

They've given it a thorough base burnishing/blasting and wanted to discuss the next steps as what happens next is different depending on what we decide.

Image


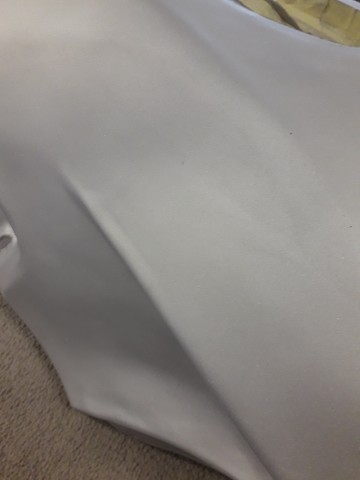
The idea of fine media blasting and scotchbriting and leaving the tank in bare metal, just lacquered, is a non-starter. The surface finish of the tank is, in places, not good enough. There's some small creases that weren't visible before burnishing...

Image


...and divots or pinholes (not all the way through) in welds that only became visible once the surface was burnished.

So, it's on to plan B. The main part of the tank will be filled and finished and then the whole thing will be painted silver and then hydrodipped in a brushed steel finish.
 
Spent a few hours at work this morning putting some time in on the Ducati.

Wahed the tank out and put it to dry in front of the big space heater so it'll be warm and bone dry for putting the Caswell sealant in tomorrow.

Got in with mating the frame the with the engine, but had one of those days where everything was going wrong. Took me 2 hours to get the frame on the engine and swingarm and get all the bolts in - don't know why but nothing would line up and working on my own made it doubly difficult - and then the bolt for the shock mount on the swingarm dropped inside the swingarm. So I've got to take it all apart again tomorrow to get the bloody bolt out of the swingarm and start again.

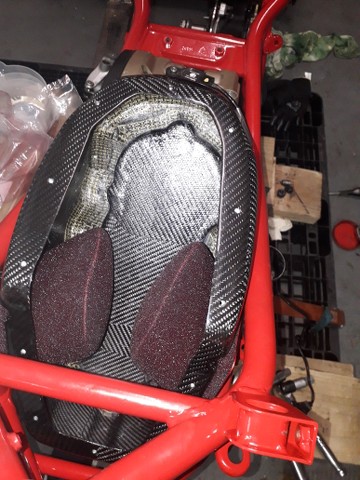
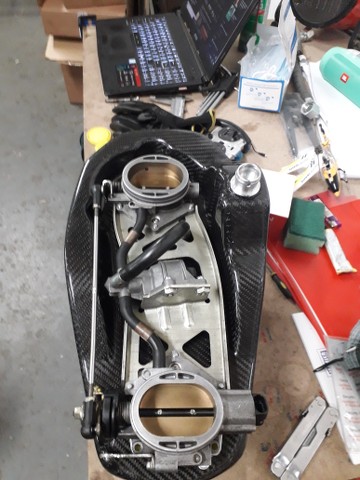
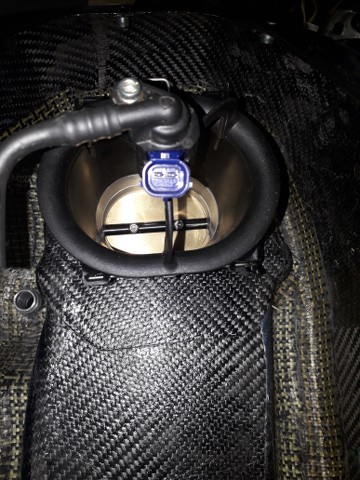
At least I got a chance to chuck the new air box in place and take some pictures...

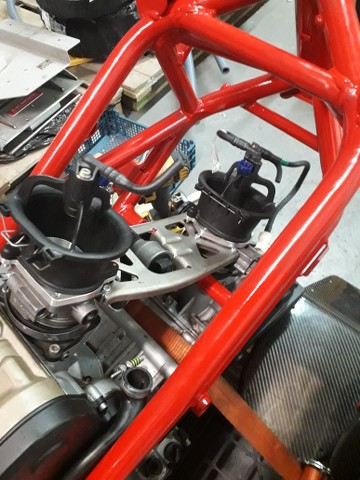
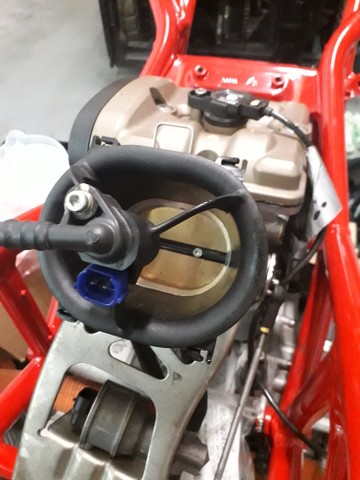
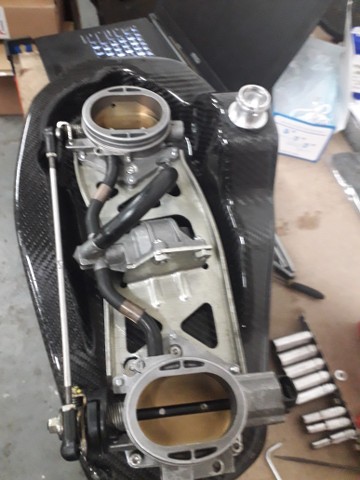
I'm using the 1098 throttle bodies with Panigale inlet trumpets...

Image


Image


Image


There's a machined aluminium adaptor plate between the throttle bodies and trumpets..

Image


The air box sits on top of the adaptor plates...

Image


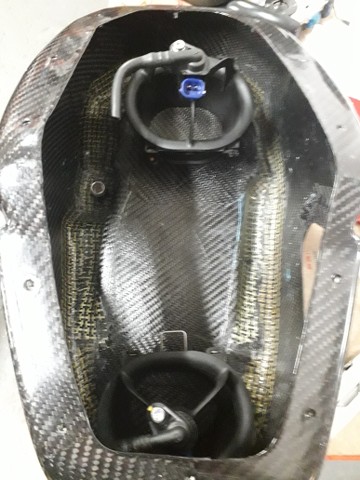
..and the bottom of the air box will have holes cut in it that match up with the bores of the throttle bodies and the trumpets will sit inside the air box...

Image


...and the airbox will be sandwiched between the two, fixing it in place. The air filters are MWR 1098 race items which have good dyno results and increase air box volume and seal better than the OEM style, full width, filter.

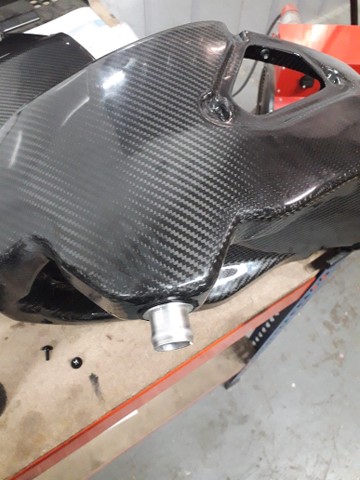
I need to turn up a hose fitting to connect the crank case breather hose to the air box...

Image


..and fabricate a coalescer, basically a cage with stainless steel wool in, to sit inside the air box on top of the breather hose fitting to coalesce the oil out of the crank case air.

And I've got to pipe up the injectors and get the fuel hose out of the air box and do the same with the injector wiring.
 
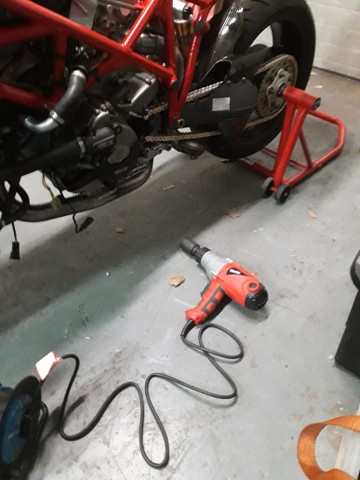
Got the front sprocket nut tightened up with the big boy, mains powered, "raddle gun", all of the ugga-dugga's...

Image


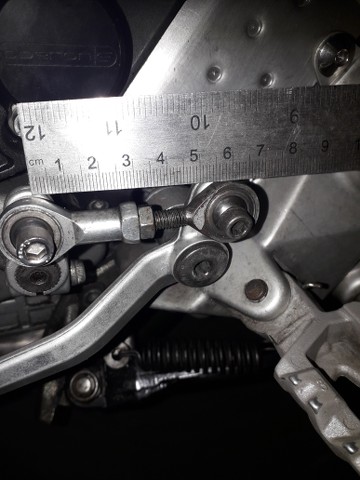
...and then the foot peg, case saver, sprocket cover and shift mechanism all bolted on...

Image


I would like to stick a quick shifter on, but not sure it's possible to get one so short?

Image


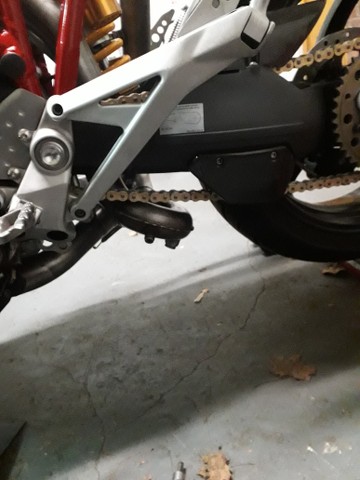
Got a bit of an issue with the bottom chain run being too close to the exhaust...

Image


...but I'm not too bothered as there's a 42T sprocket on the back. Standard 1098 gearing is 15/39 but I went larger on the back as I don't particularly need the gazillion miles and hour, or more, top speed of the sports bike. I've got a 40T spare so I'll stick that on tomorrow and see if that lifts the chain enough. Otherwise I can go for a 14T on the front and then go even smaller on the back....

Started work on the airbox. Crank case breather hose spigot bonded in place...

Image


..and throttle bodies positioned on underside of airbox and then mounting holes spotted and drilled...

Image


...and then inlet trumpets secured in place...

Image


.. it's a tight fit...

Image


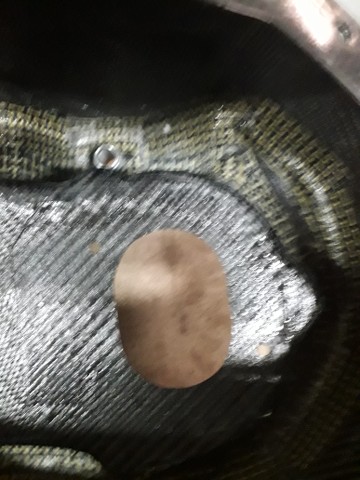
.. the inlet hole is marked and chain drilled...
 
Chain clearance is sorted, without the need to change sprockets. Span the rear hub eccentric through 180 degrees and added a link to the chain.

Throttle bodies and trumpets are in the airbox...

Image


Image


Image


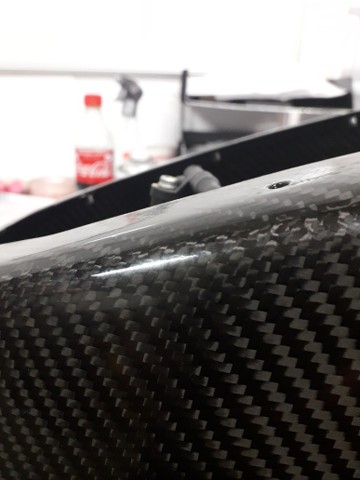
...but I'm not happy with it. The throttle bodies and trumpets are not sealing perfectly to the air box, inside and out, because the carbon is not perfectly flat and smooth. I think I'll cut some discs of aluminium sheet and trap them between the throttle bodies and trumpets, and these will seal properly, and open up the holes in the bottom of the air box and then bond the aluminium discs to the underside of the airbox.
 
Great stuff i love a good build thread and some sexy fabrication what's not to like (y) .
 
Dropped the engine off with Nelly at Cornerspeed for him to do the voodoo that he does so well. Also chucked in the swingarm, for new bearings, and the rear shock, for stiffer spring and a new remote preload adjuster hose. He reports that supply of parts and consumables is becoming an issue; Ducati UK have been supplying to all orders placed with them, irrespective of where in the world the customer is based, and Ducati HQ have not been sending out any meaningful quantities of new stock - presumably because their supply chain has been decimated by results of lockdown etc. in Italy. Nelly is a Motul devotee and can only now buy oil in 44 gallon drums and anti-freeze is rarer than rocking horse pooh. Hoping for 3 weeks or so for the work to be done.

I also went over to the other side of Mansfield to visit a paint shop, recommended by a Harley riding delivery driver who regularly delivers to work and who has taken an interest in the Multistretta since it has been in the factory, called Vale Paints. Liked what I saw there and they're going to powder coat the frame, bead burnish and lacquer the tank (I'll scotch brite it to give it a brushed look between the burnishing and the lacquering) and paint the bodywork.

I told the guy who runs the place that I was looking for the paint finish to replicate the factory quality; he said he can't normally paint that badly but he'll give it a go........

Going for flat black bodywork with white and red logo's.

They had a fibreglass bodied car in the paint bay having all of its trim refitted after painting. The back end was peeping out and I thought it was an E-type but it turned out to be a "Rotherham". Made in the 1950's it had a full fibreglass body with no chassis, the suspension and engine and everything else bolted straight to the body. Designed by an aircraft engineer and the one they had is the only one that's still with the original owner. Never heard of them, has anyone else?

Going to pause work on the tank to finish the frame next week, welding in the cross-members and mounting brackets that had been tacked in and adding a couple of gussets to strengthen the frame between the engine mounts (a known weak point when you start chucking serious power out), and then drop it off for powder coating.
@Nelly 🐘 is on here :)(y)
 
It’s been great following this project. Looking forward to firing up in the near future. The quality of the workmanship in that tank, in fact throughout the whole build, is second to none.
Just to add that although it’s all been posted up in one hit, it’s a copy and paste over many months..... there’s no longer any supply issues with parts or oil for that matter now 😂😂😂😂😂🤣
 
Back
Top Bottom